Introduction
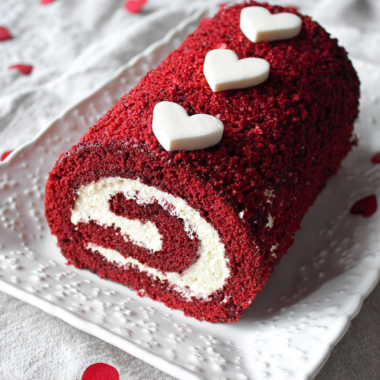
The Pink Velvet Cake is a charming dessert that dazzles with its vibrant hue and delightfully soft texture. This cake stands out not just for its looks, but also for its rich flavor profile, making it a delightful showstopper at gatherings.
At first glance, the vivid pink color brings an element of fun, while the velvet cake base offers a luxurious mouthfeel. It strikes a perfect balance between classic vanilla and subtle cocoa notes that resonate well with both children and adults alike.
Made with a few simple ingredients, this cake is surprisingly easy to whip up, creating a delicious centerpiece for birthday parties, anniversaries, or just a cozy weekend treat.
Ingredients
- 2 ½ cups all-purpose flour
All-purpose flour provides the structure for your cake, allowing it to rise and hold its shape. For a softer texture, cake flour can be substituted, resulting in a more tender crumb. - 1 ½ cups granulated sugar
Sugar not only sweetens the cake but also contributes to its moistness and texture. The sugar granules help to aerate the batter when creamed with butter. - 1 cup unsalted butter, softened
Butter adds richness to the cake and helps create a tender crumb. Be sure it’s softened for easy creaming with sugar, which enhances overall volume. - 1 cup buttermilk
Buttermilk adds moisture and a slight tang that balances the sweetness. Its acidity reacts with baking soda, making the cake rise beautifully. - 3 large eggs
Eggs provide both moisture and structure; they help bind the ingredients and contribute to the cake's leavening process. - 1 tablespoon vanilla extract
Vanilla enhances the overall flavor, forming a comforting base that complements the cake's richness. - 1 teaspoon baking soda
Baking soda acts as a leavening agent, causing the cake to rise. The acidity in buttermilk activates the baking soda, ensuring a light texture. - 1 teaspoon baking powder
Similar to baking soda, baking powder provides extra lift, ensuring the cake is fluffy and delicate. - 2 tablespoons unsweetened cocoa powder
Cocoa powder adds depth to the flavor without overpowering the cake. It also contributes to the beautiful pink hue when combined with the other ingredients. - Red food coloring
A few drops of red food coloring are essential to achieving the beautiful pink color associated with this cake. Adjusting the amount can create various shades.
Directions & Preparation
Step 1: Preheat your oven to 350°F (175°C).
Preheating ensures that your cake batter begins baking immediately upon being placed in the oven, promoting even rising and a uniform crumb. This is an essential step to avoid denser sections.
Step 2: Grease and flour two 9-inch round cake pans.
Properly greasing and flouring the pans helps prevent sticking, ensuring the cakes release easily after baking. Consider using parchment paper for added assurance.
Step 3: In a large bowl, cream together the softened butter and sugar until light and fluffy.
Creaming butter and sugar incorporates air into the mixture, which contributes to the cake's rise. Beat until the mixture is pale and fluffy to achieve the best texture.
Step 4: Add eggs one at a time, mixing well after each addition.
Incorporating eggs gradually allows them to combine smoothly into the batter, ensuring a uniform cake. This step is crucial for achieving proper emulsification.
Step 5: Stir in the vanilla extract.
Adding vanilla at this stage allows its flavor to infuse into the batter, enhancing the overall taste of the cake and helping to balance the sweetness.
Step 6: In another bowl, sift together the flour, cocoa powder, baking soda, and baking powder.
Sifting dry ingredients helps remove lumps and ensures even distribution of leavening agents. This provides a consistent rise throughout the cake.
Step 7: Alternate adding the dry mixture and buttermilk to the butter mixture, starting and ending with dry ingredients.
This technique minimizes the risk of over-mixing the batter, which can lead to a dense cake. Alternating helps maintain the desired light texture.
Step 8: Add a few drops of red food coloring to the batter and mix until fully incorporated.
Incorporating food coloring at this point ensures an even distribution throughout the batter, achieving a vibrant hue without streaks.
Step 9: Pour the batter evenly into the prepared cake pans.
Pouring evenly helps ensure uniform baking, preventing one layer from cooking faster than the other. Spreading the batter to the edges promotes a flat top for frosting.
Step 10: Bake in the preheated oven for 25-30 minutes, or until a toothpick comes out clean.
Checking for doneness with a toothpick allows you to gauge if the cake layers are fully cooked. Overbaking can lead to a dry texture, so keep an eye on them!
Step 11: Allow the cakes to cool in the pans for 10 minutes before transferring to a wire rack.
Cooling in the pans helps the cakes set but transferring them prevents sogginess from steam, ensuring they retain their structure.
Step 12: Once cooled, frost with your favorite cream cheese frosting.
A rich cream cheese frosting complements the flavors of the cake, providing a creamy texture and tanginess that balances the sweetness of the cake.

Choosing the Right Food Coloring
When it comes to achieving the perfect pink hue, the choice of food coloring matters. Gel food colorings are often more concentrated than liquid varieties, allowing for control over the shade. Start with a small amount and gradually increase the intensity until you reach your desired color. Remember, the hue may change slightly during baking.
Pairing Flavors for a Twist
While the classic recipe shines on its own, consider adding complementary flavors to elevate your Pink Velvet Cake. A hint of almond extract or a touch of lemon zest can create a delightful twist. Experimenting with these flavors can add depth and make the cake unforgettable, giving it a personal touch.
Presentation Ideas for Your Cake
The aesthetic appeal of a Pink Velvet Cake is unparalleled, so think creatively about presentation. Top it with fresh berries, edible flowers, or even a drizzle of ganache for an elegant touch. Consider serving it on a stand to highlight its color and beauty, making it not just a dessert but a centerpiece for your table.
FAQs
What if my cake layers dome in the center?
If your cake layers are doming, it's likely due to oven temperature being too high. You can level them with a serrated knife after they've cooled.
Can I make this cake without red food coloring?
Yes, you can omit the food coloring for a traditional chocolate flavor without the pink hue. The cake will still be delicious.
What if my buttercream is too thick for spreading?
If your frosting is too thick, add a tablespoon of milk or heavy cream at a time, mixing well until the desired consistency is achieved.
How can I make the cake less sweet?
To reduce sweetness, consider lowering the sugar by about ¼ cup and adjusting the frosting accordingly to balance flavors.
Can I add nuts or chocolate chips to the batter?
Yes, adding nuts or chocolate chips can enhance texture and flavor. Just ensure not to overload the batter to keep the structure intact.
What if my frosting is too runny?
If your frosting is runny, try chilling it in the fridge for a bit to allow it to firm up, or add more powdered sugar to thicken it.
Conclusion
The Pink Velvet Cake is more than just a dessert; it’s a celebration of color, flavor, and creativity. Once you master the basic recipe, feel free to experiment and make it your own.
Whether for a special occasion or simply to delight your loved ones, each slice promises a moment of joy. So gather your ingredients and bake your way to a vibrant masterpiece.
Recipe Card

Creating a Luscious Pink Velvet Cake for Any Occasion
Ingredients
Method
- Preheat your oven to 350°F (175°C).
- Grease and flour two 9-inch round cake pans.
- In a large bowl, cream together the softened butter and sugar until light and fluffy.
- Add eggs one at a time, mixing well after each addition.
- Stir in the vanilla extract.
- In another bowl, sift together the flour, cocoa powder, baking soda, and baking powder.
- Alternate adding the dry mixture and buttermilk to the butter mixture, starting and ending with dry ingredients.
- Add a few drops of red food coloring to the batter and mix until fully incorporated.
- Pour the batter evenly into the prepared cake pans.
- Bake in the preheated oven for 25-30 minutes, or until a toothpick comes out clean.
- Allow the cakes to cool in the pans for 10 minutes before transferring to a wire rack.
- Once cooled, frost with your favorite cream cheese frosting.
Notes
Additional serving suggestions: pair with a crisp salad, garlic bread, or roasted seasonal vegetables for balance.
For make-ahead, prep components separately and assemble just before heating to preserve texture.
Taste and adjust with acid (lemon/vinegar) and salt right at the end to wake up flavors.